Friday, September 27, 2013

Cuttin" & Stampin" Weekly Challenge #38


#38
Challenge:   Use your Scraps
September 24 - 30th, 2013

Hi guys...what a difference a week makes. This time last week my husband was installing a new ceiling fan in my stuffy scrapbook room and yesterday morning I woke up freezing and had to add a blanket to the bed. I love fall. It is my favorite season of the year. Just hoping it hangs around long enough to enjoy having our windows open and some fresh air blowing through the house.

This week my challenge from Cuttin' and Stampin" was to use the Paper Smooches Artisan Blocks stamp set, five colors of the Bazzill Electric Sheets, and any paper scraps that I had in my scrapbook room. I had a blank slate, but I really had no clue on where to begin. Without the papers having a design or image to get me started, it was a true challenge for creativity. Looking at the neon colors of the papers I finally decided to make something fun that maybe someone like my Grands might enjoy and the process began.

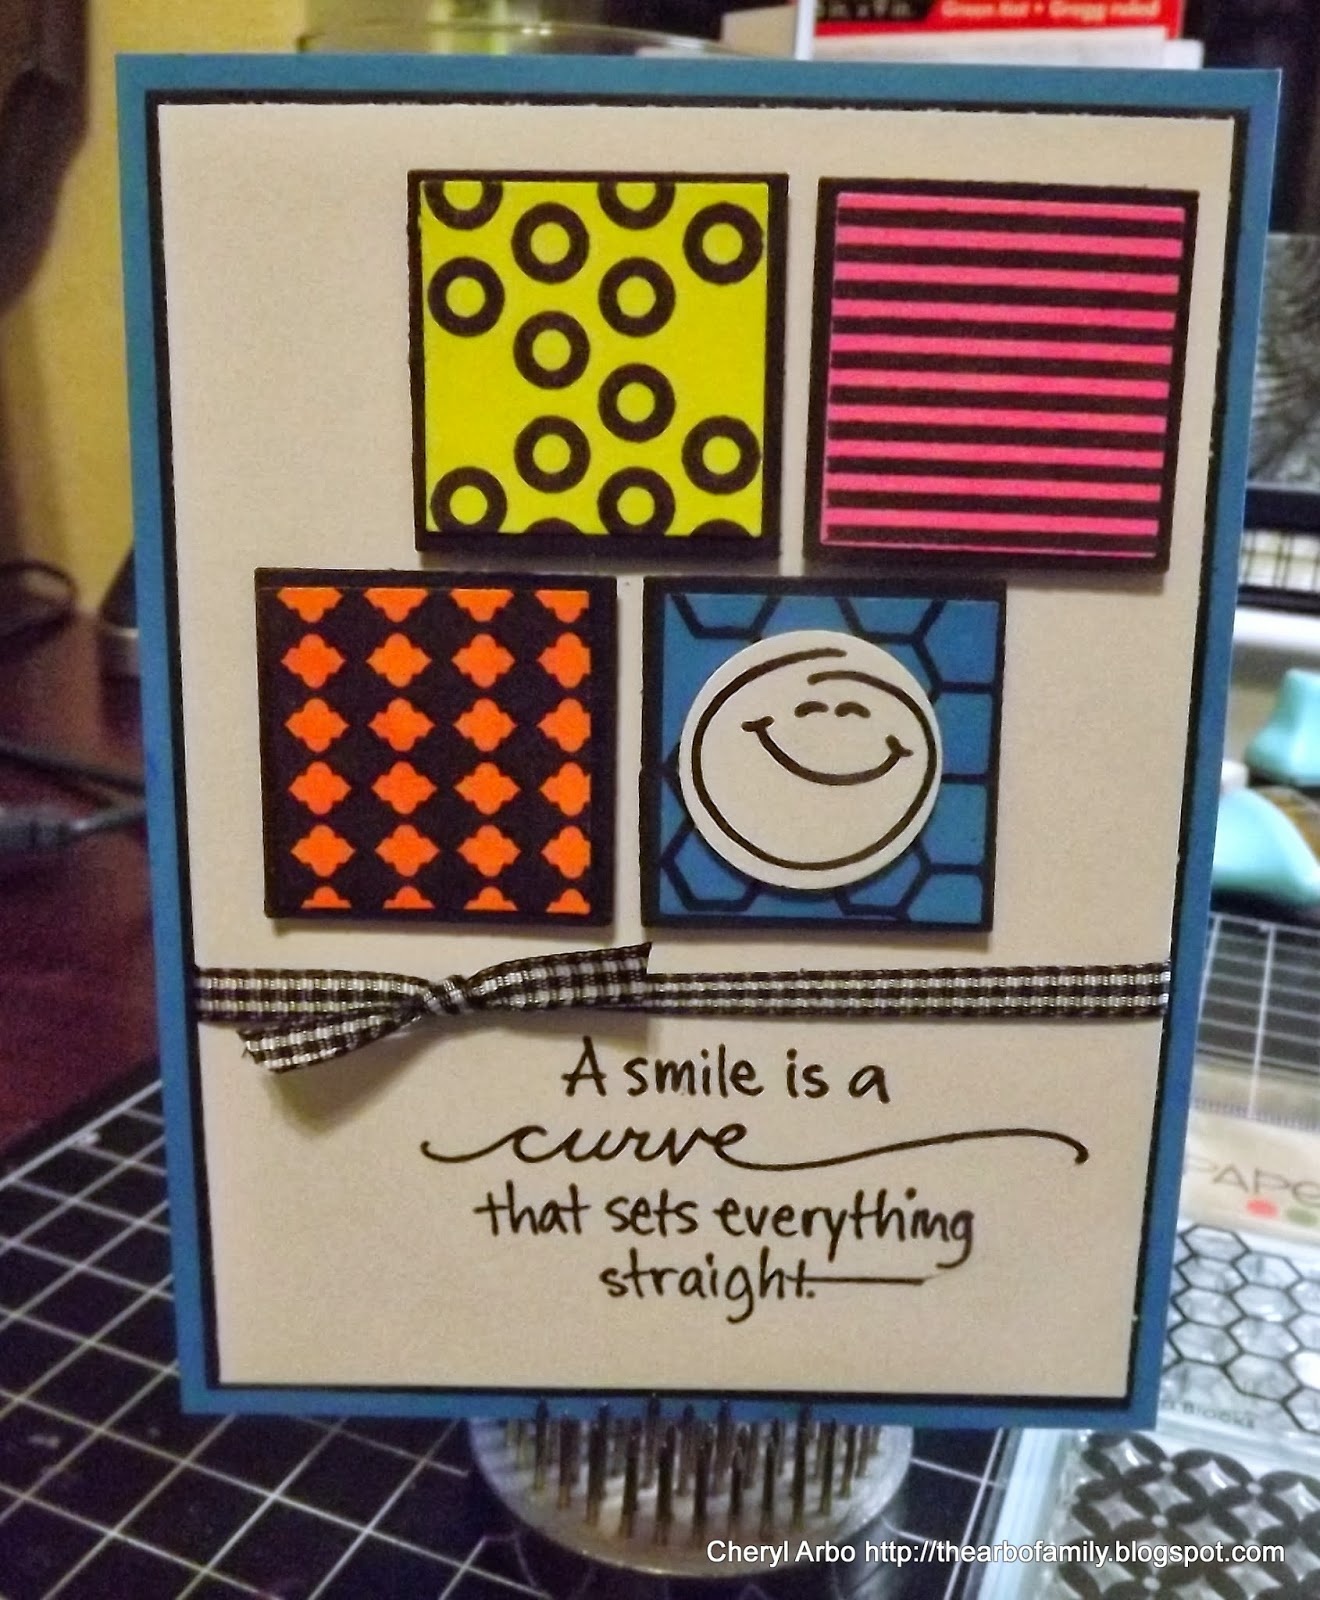
I started out with a blue A2 card base, which is cut 5.50" x 8.50" and scored at 4.25". From my scraps I cut a black base layer at 4" x 5.25" and a white top layer at 3 7/8" x 5 1/8". Using the Artisan Blocks stamp set, I stamped four images using my favorite black ink, VersaFine Onyx Black, onto four pieces of the Bazzill paper. I then used a 1 1/4" punch to cut the image, and using more of my black scraps, I used a 1 1/2" punch to matte each paper. To assemble the card I used a cute stamp I had in my stash and stamped the image on the bottom of the white top layer, adherred the four matted squares to the top of my card, tied a knot using a scrap of 12" black & white gingham ribbon. I also used a 1" circle punch to cut the smiley face and adherred it to one of the squares. Both my smiley face and four matted squares were raised using mounting tape to add dimension. I then adherred my white top layer to the bottom black layer and then these two layers were adherred to the base card. Just a fun, cute card to make anyone smile!
 
For my second card I started with my favorite top folding card, which measures 4.25" x 11", scored at 5.50". Using a scrap white card base I ran it through my Big Shot using a spider web embossing folder. From there continuing to use the Bazzill papers and scraps, I die cut a variety of three black bats, an inked pumpkin, and a small oval for my verse. I then stamped the Artisan Blocks stamps on three of the neon papers and then pieced them together to form my banners. I stamped a cute spider on my pumpkin and then again, I used mounting tape under each image on the card for added dimension. I thought it turned out soooo cute!
 
 
Well, my friends that is it for today. I hope you have enjoyed my two cards. I must say the second one came to me much easier than the first one did.
 
If you are interested, during this weeks challenge only, you may buy both the stamp set and the papers I used at a discounted price. It also includes a second stamp set and FREE freight. You may go here to see this weeks special.
 
Don't forget, if you would enjoy reading the Cuttin' and Stampin" Blog each week, you can subscribe here. If you would like to participate in one of the challenges, you may click here. Of course if you would prefer to just follow on Facebook you can "like" their page here.
 
HAPPY SCRAPPIN....Cheryl


Please make sure your creation post has a link back to Cuttin' and Stampin'

Thanks for playing along we will be announcing the winners on October 4, 2013.

You can link your project Here.

Wednesday, September 25, 2013

Sneak Peak.....

Hey guys....just a quick tease from my upcoming post with the Cuttin' and Stampin" Design Team Weekly Challenge scheduled for September 27th.  I just had to throw in a sneak peak. 
See you on Friday!


HAPPY SCRAPPIN..........Cheryl

Tuesday, September 24, 2013

Happy Anniversary To Me

It's hard to believe, but tomorrow I will be married for thirty-seven years. Thirty-seven wonderful years with my one and only. I met Rick when we both worked at JC Penney. Honest to God, the very first time I saw him, I told one of my friends, that also worked there, that he would be my future husband. Rick would come over to my department at the end of the evening and make small talk . One day he hung around after we closed and said "When are you going to go out with me?" and I responded "When are you going to ask me?" We had our first date the end of January, he asked me to marry him in May, and we married in September. I have had the most wonderful, blessed life with Rick. Looking back we both say our early years with raising our kids and making ends meet, were some of our best days and happiest moments. I found a sign and we have it hanging in our living room. "If I had my life to do all over again, I would meet you sooner, so I could love you longer" 
 
When I saw the Echo Park "Beautiful Life" paper collection in the Flamingo Scraps online store, I knew I wanted to make a small mini album for our upcoming anniversary. I wanted to keep it simple with lot's of room for pictures and journaling. I started with a 12" x 12" piece of designer paper and cut it down to 9.25" x 11". On the 9.25" width I scored it at 2.50" and 6.75". On the 11" width it is scored at 5/8", 7", and 7.75". After trimming away both two opposite ends on the 5/8" score line and removing both sides starting at the 7" score line to the ends, I rounded the corners of both opposite flaps and folded the center section together using the scored lines, and then brought the 5/8" tab up pressing firmly after applying adhesive.
 
 
The liners for the outside and inside cover measured 4" x 1/2", 3" x 4", and 4" x 6 1/8". 


For my inside pages I used the coordinating solid card stock measuring 12" x 12".  I trimmed five of these to 7" x 9.25" and then scored them on the 9.25" width 2.50", and 6.75". On the 7" width at the 5/8". My liners measured 4" x 6 1/8" and followed the same instructions as the cover.


 Once assembled I used a 1 3/8" circle punch and cut a half circle out from each page for each 4" x 6" mat that was inserted into each pocket.


I inked the edges on all of the liners and mats. On each mat I used a small double hole punch and tied a bow using several pieces from the seam binding sampler. I used my Bind It All and bound the mini with a brown coil.
 

I used the plentiful supply of coordinating stickers to decorate the mini using mounting tape and then one magnetic closure for the cover.


This was a very easy, non fussy, non complicated, but sweet album to make. The papers were so pretty that other than inking the edges using my favorite Prima Dark Rust chalk ink, seam binding, coordinating stickers, Heidi Swapp Banners, and the Fancy Pants Cork Hearts, the paper collection spoke for itself.
 
I hope you have enjoyed visiting my blog today. While you are here, I would also love for you to subscribe by email. Also I would love for you to follow the Flamingo Scraps Blog here, to like their Facebook page click here, or if you are interested in buying this paper collection, or anything I used to make this mini, you can find it here in the store.
 
HAPPY SCRAPPIN!
 

Sunday, September 22, 2013

Two quick posts

Two quick posts tonight. My Grand had to tell the class about herself in a "fill in the blank form" and then using a file folder, cut into a girl shape, she had to make a picture of what she thought she looked like. Ashley and Madison worked on it today and this is what they came up with. I am sooo impressed. I think they did such a nice job on it. I love Madison's printing. This will be something to cherrish years from now. A lot of imagination and creativity on Ashley's part too. I think I might have another scrapbooker in the family! lol

 
You can click on the picturer to see it better up close

 
I just wanted to show two cards I made for my monthly card challenge I do each month. In August I made my dear friend this card. In making the card, I was very much out of my comfort zone. Typically I am not a pink or purple person, but knowing who was receiving it, I really wanted to use these colors. When I showed the finished card to my husband, he said. "This is not your normal type of card" I didn't think he really paid attention to the cards I show him each week, but he proved me wrong. When my friend received the card, she emailed me and said she loved it, which made me happy that she enjoyed her card.
 
 
For September's months challenge we had to use inking on our card fronts, but not from a stamp. It had to be done using a sponge, brayer, or the direct to paper technique. I have seen others make a card like this using a mask and sponge, but this was my first attempt. I love challenges. They can get you out of your comfort zone and also teach you a new technique that you learn to love doing. I have only made one such card using the direct to paper technique before, but it had been a while back. Thru trial, error, and a ton of paper......I finally was happy with my card. My only regret was in not asking my partner if she minded a Halloween card. I have another wonderful friend that does not celebrate or decorate for Halloween. I totally respect her for that. It was not until I had mailed this card that I thought about it and had second thoughts. I really enjoyed making this card. I am sure I will be doing something like this again. Maybe using the moon and Santa and his sleigh for Christmas.
 
 
Happy Stampin!


Friday, September 20, 2013

Cuttin" and Scrappin" Challenge

#37
Challenge:   Use 3 punches
September 17 - 23rd, 2013

At Cuttin" and Stampin" this week we are having a "Three Punch Challenge." I love using punches, I own many of them, and never thought twice about how many I could use on a single page or card until this challenge. I was given two shades of Bazzill Basic blue papers to use along with using three punches of my choice. It took me the longest time to finally come up with a card using these two requirements as the basics of my card. I started off with a top fold dark blue card, measuring 11" x 4.25", scored at 5.50".  I cut my next layer out of the light blue at 4" x 5.25". I inked the Paper Smooches Borderlicious tiny polks dots border with VersaMark, sprinkled it with a white embossing powder, and then heat set the layers. I then used a 2.50" circle punch on a scrap piece of inked beige pattern paper, and a snowflake punch using a scrap of the dark blue paper. Using my hand punch I punched a small hole in the center of the snowflake and inserted a randum large snowflake brad I had in my stash and attached it to the light blue layer.


 I cut a 18" piece of ribbon and tied a bow on the bottom of the top layer.
I adhered my top layer to my card base. I stamped my verse on another scrap piece of the light blue cardstock and using my third required punch I punched this out along with a second punch on the dark blue cardstock and matted the verse.
 
 
This is the Paper Smooches "Borderlicious" stamp set and the required two shades of Bazzill papers.
 
 
These are the three punches I used for my card

 
 I am done! I must say, this was a real challenge for this gal! I may have used three punches on other projects, but I will remember this one!


Thank you for visiting my blog today. If you would like to join us in one of the Cuttin' and Stampin' weekly card challenges please go to the link here. If you would like to follow our Cuttin' and Stampin' Blog click here
 
Happy Scrappin!

Please make sure your creation post has a link back to Cuttin' and Stampin'

Thanks for playing along we will be announcing the winners on September 27, 2013.
 
You can link your project here.

Monday, September 16, 2013

Smash Book for Alex

My oldest Grandbaby will be thirteen this week and we are having her birthday party on Saturday.  She is sooooo excited about finally being a teenager! When I received my monthly kit from Flamingo Scraps I was tickled to see the Heidi Swapp Memory Files, coordinating pockets and banners included. With smash books being so popular right now, I knew I wanted to make some type of fun memory book for Alex.

I started off with the largest folder file and cut it in two and then into four 5.5" x 7.5" pieces.


I took some bright cardstock and loose leaf paper and cut them all into 5.25" x 7.25" pieces
 
 
Using the smallest folder I punched two holes along both ends of the folder. Using this as a template, I proceded to punch a hole in all of the papers and inserted two ring binders to hold the book together.


From there I used the Heidi Swapp four pocket pouches, lined them with Cosmo Cricket Glitter Sheets, inserted a couple of the Maya Road Kraft Library Cards, and attached them to each of the four cut down folders


On the cover I used two ribbons from our monthly kit. One was attached along the top edge of the banner and the other just above the banner and I secured everything with staples on both ends.
 
 
I then added some randum rub-ons to say "7th Grade" along the tabbed edge,
 
 
some FancyPants Cork Arrows. and some pink chip board alphabets to add her name to the cover.

 
In the end I was happy with this project. I think Alex will just love it. She loves to scrapbook too and I can imagine she will be in my scraproom personalizing this book after her party.


If you would like to follow the Flamingo Scraps Facebook page, please click here, if you would like to follow their blog, please click here, and if you would like to purchase any of the supplies I used for this book, please go to their online store here
 
Enjoy and "Happy Scrappin"


Saturday, September 14, 2013

Using Scraps and Leftovers


I am not sure how you are, but I typicaly do not throw away my scraps. If I can stamp or punch on the smallest area I will save it and use later. After making several projects from my Flamingo Scraps July kit I had a ton of scraps and pieces leftover from both the Merry Christmas and Winter Fun paper collections to make a 12" x 12" page.
 
 I used a 12" x 12" base page, layered with an inked top layer measuring 11" x 11". I adhered strips of inked papers measuring 1/2" to 1 1/2" wide using various lengths next to each other on an acute angle.

 
 From there I layered many of the embellishments found in the Merry Christmas collection pack on the page.


 I also used a corner punch to draw your eyes out to the edge of the page 
 

 and two mats for pictures. 


Here is my finished page. I am really happy with how this finally turned out. At one point I had so many colors and patterns being used, I wasn't sure if I could avoid it being too busy.
 
 
Just to remind you, if you would like to visit the Flamingo Scraps Blog please click here,
 If you would like to follow us on Facebook please click here
To shop and order from the store pleae click here
 
Happy Scrappin!!

Catalog Delivery Schedule

"As a measure to help minimize the effects of the ongoing supply chain difficulties, CTMH will be transitioning back to a three-month c...